Self Host Guide
Run TankSync™ entirely on your own infrastructure. No mqtt.smartghar.org dependency. Works fully offline once configured.
Trade-off: you give up the PWA at
tanksync.smartghar.org(it talks to our cloud only). You keep the hub's local web UI + Home Assistant integration + all on-hub features.
| Component | Why | Where it runs |
|---|---|---|
| MQTT broker | Where the hub publishes; where HA subscribes | Pi / NUC / NAS / VPS |
| Home Assistant | Your dashboard + automations | Same box or separate |
| (Optional) Reverse proxy | If you want remote access via HTTPS | VPS or behind your home router |
Mosquitto is the simplest broker. If you're already on HA, the built-in "Mosquitto broker" add-on covers everything.
If you're running Home Assistant OS / Supervised:
- Settings → Add-ons → Add-on Store → Mosquitto broker → Install.
- Configuration tab: leave defaults.
-
Settings → People → Users → Add user named e.g.
mqtt_user. Set a password. Toggle the user off for HA login (it's MQTT-only). - Start the add-on. Click Open Web UI to confirm it's running.
- Settings → Devices & Services → Add Integration → MQTT → "Mosquitto broker" (HA auto-detects).
-
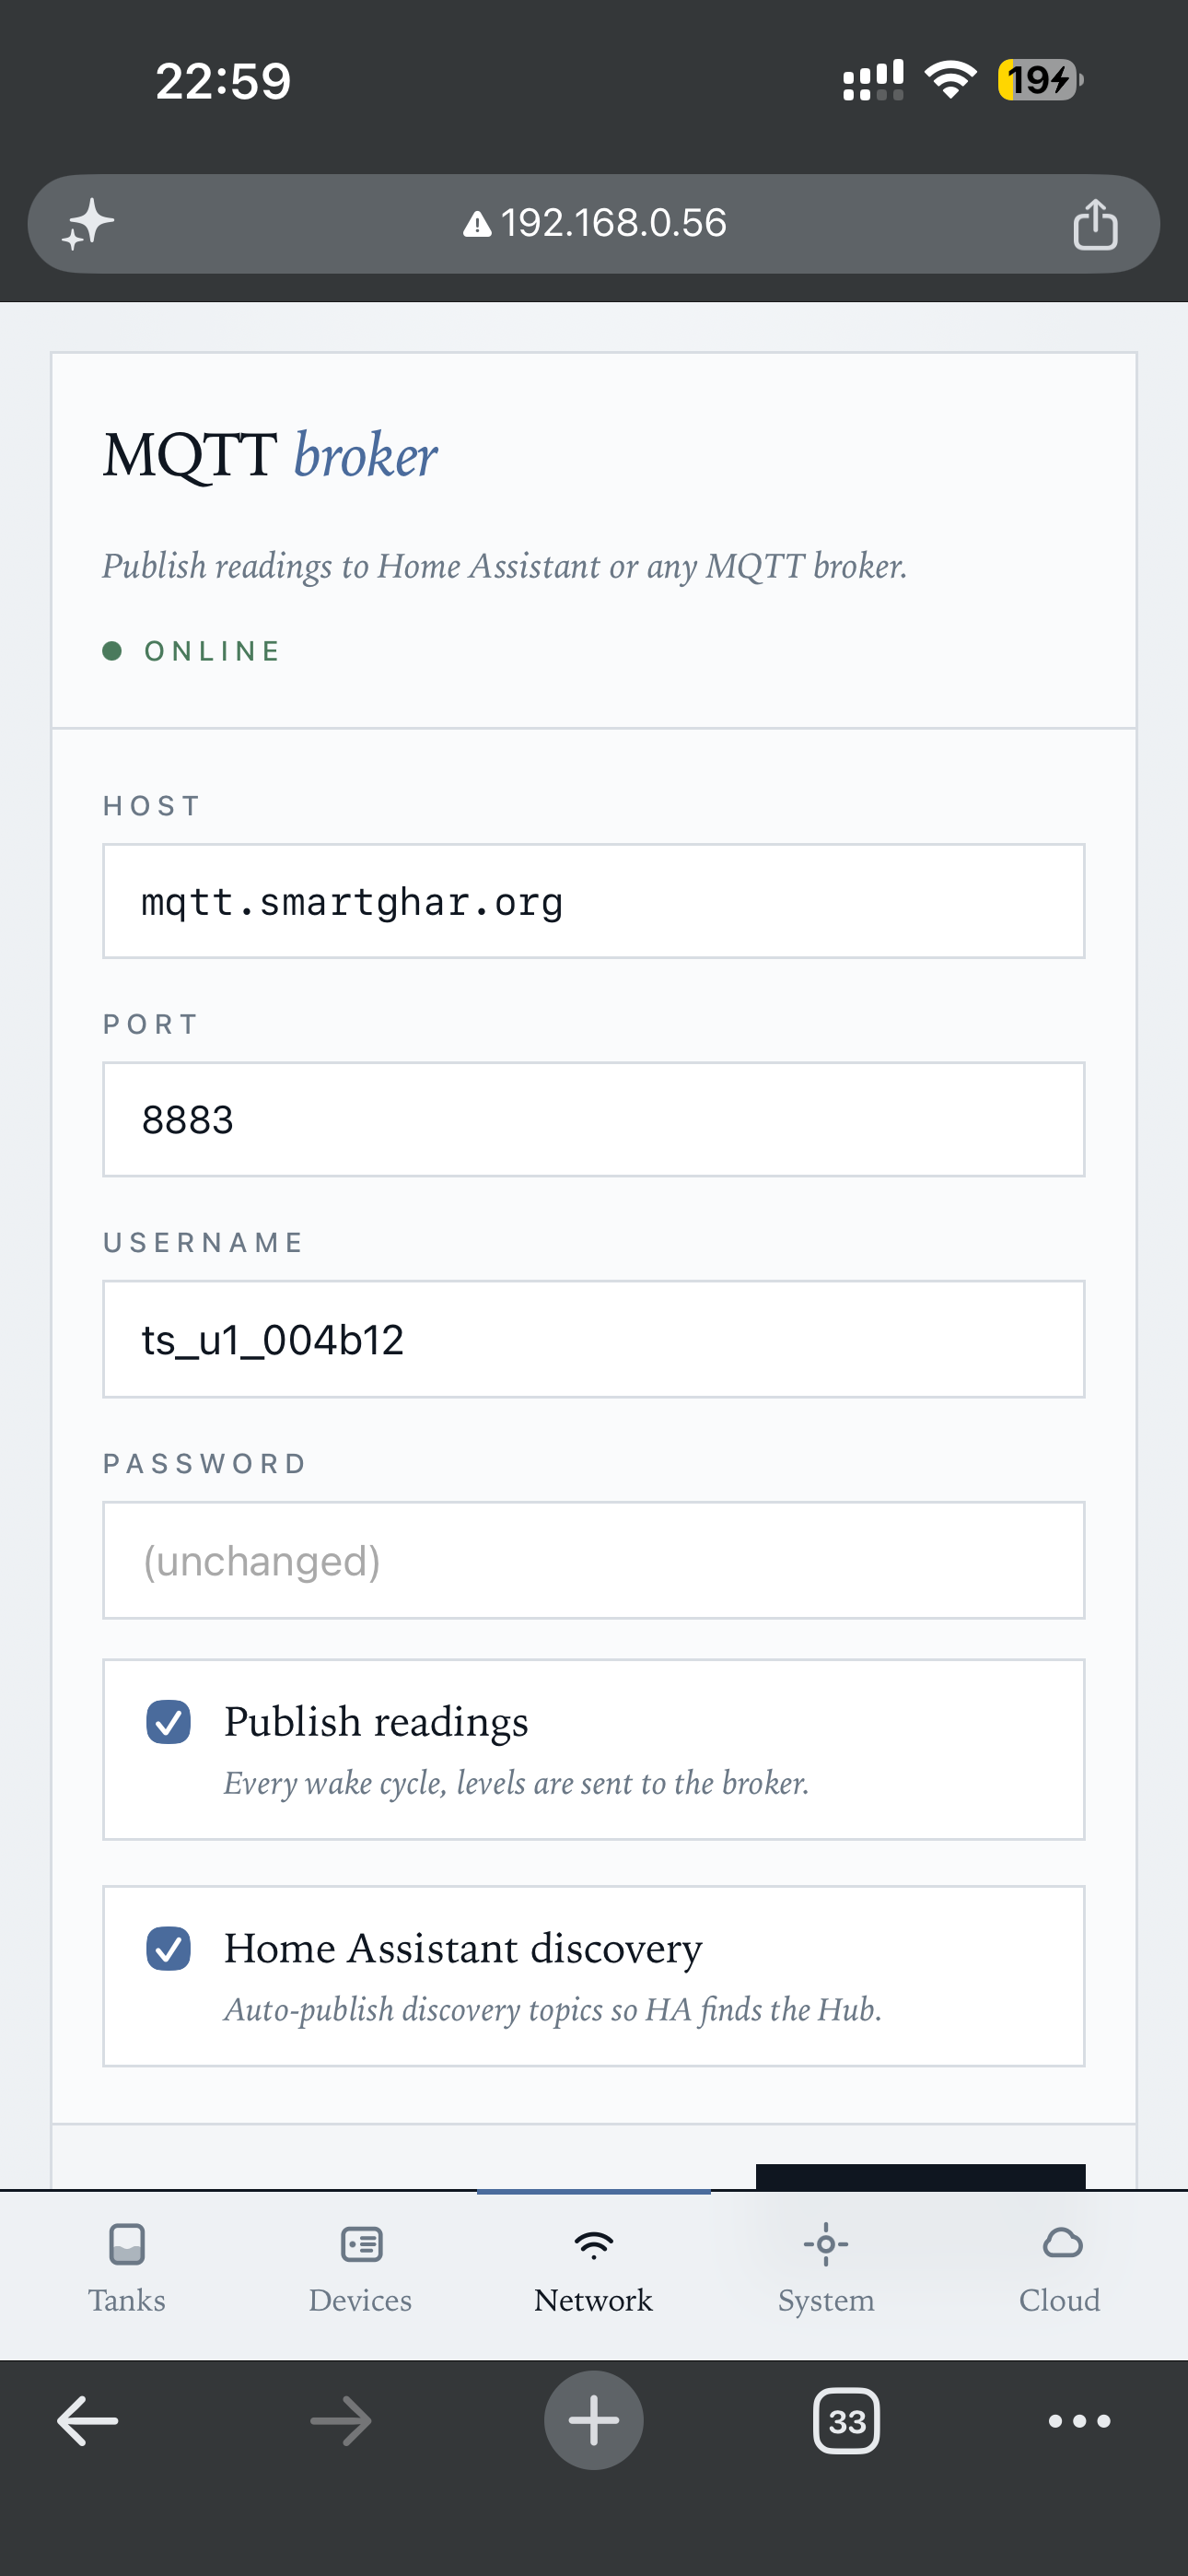
In the TankSync hub (local web UI → Network tab → MQTT):
-
Host: the IP of your Home Assistant box (e.g.
192.168.0.100) -
Port:
1883 -
Username + Password: the
mqtt_usercreds from step 3 - Use TLS: off
- HA auto-discovery: on
- Save.
-
Host: the IP of your Home Assistant box (e.g.
Within ~30 seconds, the hub publishes its first retained topics. HA auto-discovers them. Your tanks appear under Settings → Devices & Services → MQTT as entities.
Picture of the MQTT config screen in the hub's web UI:
For when you'd rather run Mosquitto on a Pi / VPS / Docker host without HA.
sudo apt update
sudo apt install mosquitto mosquitto-clients
sudo systemctl enable --now mosquitto

# Create a password file
sudo mosquitto_passwd -c /etc/mosquitto/passwd tanksync
# (prompts for password)

# Update the broker config
sudo tee /etc/mosquitto/conf.d/tanksync.conf <<EOF
listener 1883
allow_anonymous false
password_file /etc/mosquitto/passwd
persistence true
persistence_location /var/lib/mosquitto/
EOF

sudo systemctl restart mosquitto

# Verify
mosquitto_sub -h localhost -u tanksync -P '<password>' -t '#' -v
In the hub's web UI:
-
Host: Pi's local IP (e.g.
192.168.0.50) -
Port:
1883 -
Username:
tanksync - Password: what you typed at the mosquitto_passwd prompt
- TLS: off
docker run -d --name mosquitto --restart unless-stopped \
  -p 1883:1883 -p 9001:9001 \
  -v $(pwd)/mosquitto-data:/mosquitto/data \
  -v $(pwd)/mosquitto-config:/mosquitto/config \
  eclipse-mosquitto:2

# Add a user inside the container:
docker exec mosquitto mosquitto_passwd -c /mosquitto/config/passwd tanksync
# Then edit /mosquitto/config/mosquitto.conf inside the container
# to set allow_anonymous false + password_file + restartPlain MQTT on port 1883 is fine inside your home network. If you want to access the broker from outside (e.g. you self-host a small VPS), use TLS.
The easiest path:
-
Point a subdomain at your VPS (e.g.
mqtt.example.com). -
Use certbot to get a Let's Encrypt cert.
-
Configure Mosquitto:
listener 8883 protocol mqtt cafile /etc/letsencrypt/live/mqtt.example.com/chain.pem certfile /etc/letsencrypt/live/mqtt.example.com/cert.pem keyfile /etc/letsencrypt/live/mqtt.example.com/privkey.pem allow_anonymous false password_file /etc/mosquitto/passwd -
In the hub's web UI:
-
Host:
mqtt.example.com -
Port:
8883 - TLS: on
- CA: "Use system CAs" (Let's Encrypt is trusted by default)
-
Host:
-
PWA at
tanksync.smartghar.org— won't work, it's hard-coded to our broker. - Push notifications to phone — same.
- Multi-hub fleet management UI — same.
- 90-day history with insights — replaced by HA's recorder + your own graphs (e.g. Grafana + InfluxDB).
- Remote access from outside Wi-Fi — replaced by your own VPN or Tailscale-like overlay.
What you KEEP:
-
Local web UI at
http://<hub-ip>/— full settings access. - Home Assistant integration via HACS — entities, automations, history.
- OLED + LED strip + buzzer alerts on the hub itself.
- All firmware features — every TankSync feature works without the cloud.
If you want HTTPS access to the hub's web UI from outside your LAN:
# nginx vhost
server {
    listen 443 ssl http2;
    server_name tanksync-hub.example.com;
    ssl_certificate     /etc/letsencrypt/live/tanksync-hub.example.com/fullchain.pem;
    ssl_certificate_key /etc/letsencrypt/live/tanksync-hub.example.com/privkey.pem;

    # Basic auth — the hub itself doesn't authenticate
    auth_basic "TankSync";
    auth_basic_user_file /etc/nginx/.htpasswd;

    location / {
        proxy_pass http://192.168.0.56/;   # <hub-ip>
        proxy_set_header Host $host;
        proxy_set_header X-Forwarded-For $remote_addr;
    }
}
The hub's web UI has no auth by design (LAN-only assumption). Always put it behind basic auth + HTTPS if you're proxying to the internet. Don't expose port 80 of the hub directly.
After setup, watch all hub traffic in real time:
mosquitto_sub -h localhost -u <user> -P '<pass>' -t 'tanksync/#' -vYou should see retained topics for <hub-id>/status + <hub-id>/tank/<addr>/state updating every TX wake cycle. If you don't:
- Hub web UI → Network tab → MQTT panel shows green dot = connected, red = not.
- Mosquitto log:
tail -f /var/log/mosquitto/mosquitto.logfor connection errors. - Wrong creds = the hub silently retries. Check the password in both places.
Local-first is the design intent, but for users who don't want to run a broker / Pi / VPS, the cloud at tanksync.smartghar.org is one-click. The hub firmware is licensed under AGPL — anyone can fork, point their hubs at any broker, never depend on us. The "Cloud is optional" promise is in the architecture, not just in marketing.